Addin File Format
These pages describes the addin file format for World of Goo, specification version 1.1, as implemented by GooTool.
Addins are extensions to World of Goo that add or modify functionality. There are two types of addin: mod and level. Mods can modify or replace any file. Levels can do the same but also get a button added to Chapter 1 allowing them to be played. Addins can depend on other addins. For example the level addin MyLevel could depend on the MyOrangeBall mod addin.
The binary format of an addin is just a Zip file with a .goomod extension and a special directory structure. The directory structure of the Zip file follows:
- /addin.xml - An XML manifest file describing this addin.
- /text.xml - An optional XML file containing text strings.
- /override/ - A directory containing new files, or replacements for 2dboy original files.
- /merge/ - A directory containing files to merge in with 2dboy-supplied XML.
- /compile/ - A directory containing files to compile (encrypt) into bin/binltl format.
Some knowledge of XML, XSLT and XPath may be helpful to create anything but the simplest addins. There are some examples in this documentation, and more in the addin development FAQ.
You can also look at existing addins in the download section, particularly the sample category which illustrates advanced addin techniques.
Changes
Specification version 1.0 was the first public goomod version and is supported by all versions of GooTool.
Specification version 1.1 is the updated version released in November 2009, and is supported in GooTool 1.0.1 upward. If your addin is a level addin, to upgrade to this version you will need to surround your <level> with a <levels> element.
Attempts to install a 1.1 goomod into an old version of GooTool will result in a message instructing the user to upgrade GooTool.
The following features were added in version 1.1:
- thumbnail was added to the manifest file, allowing a screenshot or other image to be embedded.
- A new file /text.xml is recognised, allowing quick addition of strings.
- cutscene and skipeolsequence can now be specified on a level.
- Addins can now provide more than one level. To support this, <level> is now a child of <levels>
Comments
Comments? Discuss in the forum.
Manifest File
The "addin.xml" file contains the definition of the addin and is read by GooTool. It contains descriptions of the addin for the user, and also technical data used by GooTool. It must be located in the root directory of the goomod file.
The root XML element is addin and this has one required property, spec-version. This describes the version of this specification that the addin follows. This document describes version 1.1. This is not related to your addin version at all.
Then follow a number of required and optional elements.
- id (required)
- The globally-unique identifier of this addin. This must not change between different versions of your addin. It is used for the internal filename of the addin, for other addins to define dependencies, and to ensure previous versions of your addin are removed on upgrade.. It is never displayed to the user.
The format of the field is alphanumeric identifiers separated by periods. The field begins with your reversed domain name. This is your namespace and it is up to you to partition it as you wish. This is followed by any details needed to identify this particular addin. For example: com.mycompany.mods.mymod.
If you do not have a domain name, but you do have an account on goofans.com, you can use our domain and your username as your namespace: com.goofans.<yourname>. For example if your username is robert and you've made a level "Going Down", you might name the addin com.goofans.robert.levels.goingdown.
- name (required)
- The name of this addin, as shown to the user. It is used in various lists and displays and should be short, but should also be descriptive as to what your addin is or does. For example Going Down.
- type (required)
- This is either mod or level. Both kinds may merge and override files, but only level addins have a <level> entry in their manifest. Thus only level addins can have levels displayed in Chapter 1.
- version (required)
- The version of your addin. This is used for dependency and upgrade calculations so you should increment it on each new release.
The format is a sequence of between 1 and 4 version number components separated by periods. Each component consists of decimal digits, and within each component the version should be numerically comparable. For example, version 1.11 must be a newer version than 1.2. It is perfectly permissible to have only 1 component to the version number, in which case no periods are needed.
Examples of valid version numbers:
1
0.1
1.0.2
1.5.0.1
Note that any unused components are treated as zeros. So version "1" is equivalent to "1.0.0.0" in terms of comparison.
- thumbnail (optional)
- goomod 1.1+ only. An optional element specifying the screenshot displayed to the user in GooTool. The text content is the filename in the goomod file, and the element has the required attributes type, width and height giving the MIME-type, width and height of the thumbnail respectively. The only permitted MIME-types are image/jpeg and image/png. The recommended thumbnail size is 200x150 as larger images may be resized by GooTool giving poor quality results.
- description (required)
- The description of your addin as displayed when the user requests the properties dialog for your addin. You have two choices for the format.
The first choice is plain text, in which case any newlines in the description are preserved. CDATA is optional here.
The second choice is HTML, for which CDATA wrapping is required. HTML is identified by a description that begins with <html> and ends with </html>. You can use any basic HTML formatting allowed by Java within this description.
- author (required)
- Your name or handle. Should be fairly short.
- dependencies (optional)
- An optional element which may be omitted if your addin doesn't require any others to be installed first. GooTool inspects this when enabling your addin, to ensure that other addins you need have already been enabled. This also allows for a more modular approach to addin development. It is intended that eventually GooTool will be able to automatically download your dependencies from goofans.com
The format is a set of <depends> elements. Each of these elements has a required attribute ref, which is ths id of the addin you require. You can also specify optional min-version and max-version attributes, in which case your addin will not be enabled unless the other addin matches the versions you specify.
- levels (required)
- An element that is required for level addins, and prohibited for mod addins. It gives information about your level which will be added automatically to Chapter 1.
You should use this element rather than merge with chapter 1 yourself for several reasons. First, it allows GooTool to put your texts in text.xml automatically. Second, allowing GooTool to do it will ensure that multiple custom levels do not overlap each other on the display. And third, when World of Goo has better modding support, GooTool will add your mod to a custom chapter instead. If there are compelling reasons to still do overrides yourself, please contact the author so better support can be built into GooTool or this spec.
In goomod version 1.0, level was a direct child of addin. Goomod version 1.1 supports multiple levels, so level is now a child of levels, and there can be more than one of them present.
The level element has three required and three optional child elements.
- dir (required)
- Specifies the directory of your level under the levels directory.
- name (required)
- Specifies the name of your level in its text attribute. This is used on the chapter screen and as the title of your loading screen.
- subtitle (required)
- Specifies the subtitle displayed on the loading screen in its text attribute.
- ocd (optional)
- specifies the OCD requirements, e.g. balls,16. This element is optional; if omitted, the player will see "This one is mine -the Sign Painter".
- skipeolsequence (optional)
- goomod 1.1+ only. If this empty element is present, the end of level sequence (showing the scores and the draining balls) is skipped.
- cutscene (optional)
- goomod 1.1+ only. The cutscene to play when the level ends (if skipeolsequence is set) or when the score screen "continue" handle is clicked (if skipeolsequence is not set). Contains three strings separated by commas. First is the lead-in transition, second is the movie to play, third is the lead-out transition. Either transition may be "x" to cut directly. Example: gooTransition_in,wogcunlock,gooTransition_out or x,wogcunlock,gooTransition_out.
The name and subtitle elements may also be internationalized in the same way that existing goo levels are using two-letter language attributes.
Example Mod
Here is the manifest file for an example mod. This one is taken from the Merger test mod in GooTool's test suite:
<addin spec-version="1.1">
  <!-- The unique ID of this addin. Read the spec for uniqueness and format requirements. -->
  <id>net.davidc.test.merger</id>

  <!-- Short display name shown to user. -->
  <name>Merger Test</name>

  <!-- either "mod" or "level". For user display, and to determine whether to create a chapter 1 entry -->
  <type>mod</type>

  <!-- An optional thumbnail image of the mod (goomod 1.1+ only) -->
  <thumbnail type="image/jpeg" width="200" height="150">thumbnail.jpg</thumbnail>

  <!-- Version. Must be numerically comparable in each "."-delimited component. You could also do it without periods at all, e.g. 11281.-->
  <version>1.0</version>

  <!-- Description shown to user when mod is selected. Basic HTML is allowed if you put it in a CDATA and surround it with <html></html>. -->
  <description><![CDATA[
    <html>
    <p>This addin is a test of the merger. It has the following functions:</p>

    <ul>
      <li><b>GoingUp</b> - Changes unattached balls to UglyProduct, and turns on visual debug.</li>
      <li><b>SmallDivide</b> - Removes all black balls and adds a new structure of drip balls.</li>
    </ul>

    <p>N.B. This test addin modifies existing game levels. It is intended for test purposes only, so don't make
    any changes that could allow leaderboard fudging (e.g. changing to ivy balls would allow them to save more
    balls).</p>
    </html>
  ]]></description>

  <!-- Author shown to user. -->
  <author>davidc</author>

  <!-- No dependencies. -->
</addin>
Example Level
<addin spec-version="1.1">
  <id>net.davidc.gravitas</id>
  <name>Gravitas</name>
  <type>level</type>
  <thumbnail type="image/png" width="200" height="150">thumbnail.jpg</thumbnail>
  <version>0.5</version>
  <description>This is a lovely level you can play. It has awesome gravity!</description>
  <author>davidc</author>

  <!-- Other addins this one depends on. -->
  <dependencies>
    <depends ref="net.davidc.test.mynewball" min-version="1.0"/>
  </dependencies>

  <!-- Details about this level -->
  <levels>
    <level>
      <dir>Gravitas</dir>
      <name text="Gravitas" de="Schwerkraftas"/>
      <subtitle text="weighty matters" de="gewichtige Angelegenheiten"/>
      <ocd>balls,16</ocd>
    </level>
  </levels>
</addin>
Future
A future version of this spec may introduce a chapter addin type, if World of Goo ever supports this.
Compile Directory
Like the override and merge directories, files inside the compile directory are relative to the World of Goo installation directory.
The compile directory directory contains XML files which are compiled (encrypted) into bin format. This allows GooTool to compile the file for you, so you don't have to distribute different versions of your addin for Mac and PC.
Files ending in .xml are automatically compiled to the same filename but with a .bin extension instead. For example, your addin file /compile/res/levels/MyLevel/MyLevel.level.xml is compiled to <WorldOfGoo dir>/res/levels/MyLevel/MyLevel.level.bin.
Future
Once the .binltl format is figured out (if that turns out to be useful - it's only used for animations which seem to be programmatically triggered), another file extension will identify files to be compiled to .binltl format.
Merge Directory
Like the override directory, files inside the merge directory are relative to the World of Goo installation directory. However that's where the similarity ends. Files in the merge directory are not replaced, they are merged with the 2dboy originals (and possibly also merged with the results of lower-priority mods). Consequently the merge directory only operates on XML files.
The format of files in this directory are XSLT stylesheets, enabling full control of the produced XML. For each file that you want to merge, GooTool decrypts the 2dboy original, merges in your changes, and encrypts it back. (It also makes a backup of the original; it always merges from the 2dboy original and doesn't do incremental merging as that would have unexpected results when enabling and disabling addins).
The filenames end with the .xsl extension instead of .bin. An example of a full filename relative to your goomod root would be merge/res/levels/GoingUp/GoingUp.level.xsl. Note that the .bin suffix is replaced with .xsl.
Some knowledge of XSLT and XPath will help create complex merging rules, but the rest of this page contains some examples. You may also find davidc's XML Diff tool helpful - you give it the original XML file and your modified XML file, and it gives you back an XSL file that will make the changes.
Default rule
You need a default rule to copy across anything not matched by any other rules. Here it is:
  <!-- Copy everything not matched by another rule -->
  <xsl:template match="* | comment()">
    <xsl:copy>
      <xsl:copy-of select="@*"/>
      <xsl:apply-templates/>
    </xsl:copy>
  </xsl:template>
Modify existing elements
You can modify existing elements by selecting them with your XPath. Remember to copy @* to preserve the other attributes, and to apply-templates to copy their child elements. The follow example selects all BallInstance elements, copies their attributes, and then overrides their type attribute:
  <!-- Change existing balls to UglyProduct -->
  <xsl:template match="/level/BallInstance">
    <xsl:copy>
      <xsl:copy-of select="@*"/>
      <xsl:attribute name="type">UglyProduct</xsl:attribute>
      <xsl:apply-templates/>
    </xsl:copy>
  </xsl:template>
Remember that the most specific rule matches, so here we select the balls where their id attribute is less than 4, and copy them unchanged. In this example, we're changing to UglyProduct balls, which don't have strands defined, so we don't want to touch the first 4 balls which are already connected.
  <!-- But we must leave the first 4 balls alone, since -->
  <!-- Ugly balls don't have strand definitions -->
  <xsl:template match="/level/BallInstance[@id < 4]">
    <xsl:copy>
      <xsl:copy-of select="@*"/>
      <xsl:apply-templates/>
    </xsl:copy>
  </xsl:template>
In this example we modify the visualdebug attribute of the level element to enable graphical display of the level scene structure.
  <xsl:template match="/level">
    <xsl:copy>
      <xsl:copy-of select="@*"/>
      <!-- set visual debug. set attributes after copying them, so we can overwrite -->
      <xsl:attribute name="visualdebug">true</xsl:attribute>
      <xsl:apply-templates/>
    </xsl:copy>
  </xsl:template>
Deleting and inserting elements
Here we match all strand elements and delete them simply by not copying them at all.
  <!-- Delete existing strand instances -->
  <xsl:template match="/level/Strand"/>
If we wanted to add more Strands back in, we could select the "Arms" comment and add them there:
  <xsl:template match="/level/comment()[contains(., 'Arms')]">
    <xsl:copy/>
    <Strand .... insert our strands here >
  </xsl:template>
Or, because WoG doesn't validate against a DTD, we could just add them to the end of the level element. This is probably preferable in case comments are removed or changed by another addin or by 2dboy in a future release.
Note that the new stuff is inside the <xsl:copy> - if outside it would append after the level is already closed!
  <xsl:template match="/level">
    <xsl:copy>
      <xsl:copy-of select="@*"/>
      <xsl:apply-templates/>

      <Strand .... insert our strands here >

    </xsl:copy>
  </xsl:template>
Full example
This example modifies the EconomicDivide (displayed name: Small Divide) level using the above examples. The first template copies everything that isn't matched by another template untouched. The second template removes all balls. The third inserts balls where the old balls were (after the Balls comment). The fourth deletes all strands. The fifth modifies the level element by enabling visualdebug, and adds new Strands to the end of the file (demonstrating the second method of adding elements).
<?xml version="1.0" encoding="ISO-8859-1"?>
<xsl:transform version="1.0" xmlns:xsl="http://www.w3.org/1999/XSL/Transform">

  <!-- Copy everything not matched by another rule -->
  <xsl:template match="* | comment()">
    <xsl:copy>
      <xsl:copy-of select="@*"/>
      <xsl:apply-templates/>
    </xsl:copy>
  </xsl:template>

  <!-- Delete existing ball instances -->
  <xsl:template match="/level/BallInstance"/>

  <!-- insert drip balls into the place where the previous balls were -->
  <xsl:template match="/level/comment()[contains(., 'Balls')]">
    <xsl:copy/>
    <BallInstance type="water" x="-459.69" y="262.68" id="0" angle="0" />
    <BallInstance type="water" x="-341.64" y="279.34" id="1" angle="0" />
    <BallInstance type="water" x="-232.63" y="284.03" id="2" angle="0" />
    <BallInstance type="water" x="-122.63" y="284.03" id="3" angle="0" />
    <BallInstance type="water" x="-122.63" y="184.03" id="4" angle="0" />

    <BallInstance type="water" x="-329.74" y="411.84" id="5" angle="0" />
    <BallInstance type="water" x="-329.74" y="411.84" id="6" angle="0" />
    <BallInstance type="water" x="-329.74" y="411.84" id="7" angle="0" />
    <BallInstance type="water" x="-329.74" y="411.84" id="8" angle="0" />
    <BallInstance type="water" x="-329.74" y="411.84" id="9" angle="0" />
    <BallInstance type="water" x="-329.74" y="411.84" id="10" angle="0" />
  </xsl:template>

  <!-- Delete existing strand instances -->
  <xsl:template match="/level/Strand"/>

  <!-- Set visual debug and insert new Strands -->
  <xsl:template match="/level">
    <xsl:copy>
      <xsl:copy-of select="@*"/>
      <!-- set visual debug. set attributes after copying them, so we can overwrite -->
      <xsl:attribute name="visualdebug">true</xsl:attribute>
      <xsl:apply-templates/>

      <!-- Here is where we can insert nodes at the end of the file -->
      <!-- As a demo, just insert the new strands at the end -->

      <Strand gb1="0" gb2="1" />
      <Strand gb1="1" gb2="2" />
      <Strand gb1="2" gb2="3" />
      <Strand gb1="3" gb2="4" />

    </xsl:copy>
  </xsl:template>
</xsl:transform>
Result
How the goo am I going to reach the exit now?
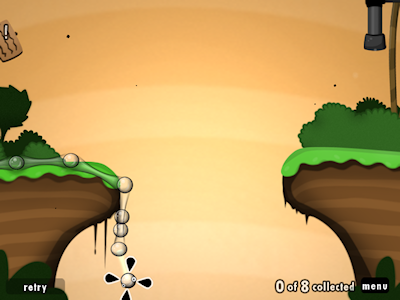
You can see a similar example in action in the merger-test addin.
Override Directory
The override directory inside the goomod file contains files that the addin provides or replaces. These can either override default files, or be entirely new files. Within this directory are files to override relative to the World of Goo installation directory.
For example to override the main body image of the Drained ball, the path relative to your addin zip file would be /override/res/balls/Drained/body.png
It is illegal to override a file in the World of Goo directory itself, and GooTool will not load the addin if it has files directly inside override.
Note that if you replace the same file that another addin does, the file will end up being overridden by the addin that has priority (as selected by the user by dragging the addins around).
The override directory is NOT the place to put XML (compiled or otherwise). Use the merge directory for this.
For Mac compatibility, ".png" files in the override directory are treated specially. They are automatically compiled into the Mac version's ".png.binltl" format, thus producing the same effect as on the PC version.
Strings File
An addin may supply strings to be added to the game's text.xml file. These strings are stored in a file called text.xml in the addin's root directory. This facility is only available in goomod format 1.1 onwards.
This allow addins to easily add or replace text in the game's text.xml file without having to write a merge XSLT. For example, you can quickly add signpost text.
The addin's text.xml file may contain both new strings (specific to that addin) and existing strings (which override entries already in the game's text.xml file).
Format
The format of this file is the same as World of Goo's existing text.xml. The root element is strings which contains a number of string children.
Each string has two mandatory attributes: id and text (the English/default text). Optionally it can have additional attributes, where the attribute name is the 2-letter language code supported by World of Goo.
Encoding
It may be important to watch the encoding of your file if you are using international character sets. Particularly, make sure you are using a UTF-8 aware editor, and specify the encoding in the <xml> directive.
Example
The following example is taken from Jingle Balls version 1.3:
<?xml version="1.0" encoding="UTF-8"?> <strings> <string id="SIGNPOST_JINGLEBALLS_1" text="'Twas the night before Christmas, when all through the house|Not a creature was stirring, not even a mouse.|The Goo Balls were nestled all snug by the fire.|In hope of avoiding the Sign Painter's ire.|Fat chance. Let's open the present early.|-Ebenezer Sign Painter" es="Era la noche antes de Navidad, y en toda la casa|ni una criatura se movía, ni tan sólo un ratón.|Las Bolas de Goo se acurrucaban junto al fuego|deseando escapar de la ira del escritor de carteles.|Gran oportunidad; pongámoslas a trabajar.|-el escritor de carteles de las Navidades pasadas." ru="В рождественскую ночь, когда все дома у меня|И даже мышь не шевельнется в норке.|Все шарики устроились уютно у огня.|В надежде избежать Авторской порки.|Но нет им шанса отдохнуть. Придется отправляться снова в путь.|-трудолюбивый Автор" de="In der Nacht vor dem Christfest, da regte im Haus|sich niemand und nichts, nicht mal eine Maus.|Die Goo-Bälle machten es sich vor dem Feuer bequem.|In der Hoffnung der Wut des Schildermalers zu entgehen.|Gute Chancen. Lasst uns das Geschenk früh öffnen.|-Ebenezer Schildmaler" nl="'t Was de nacht voor Kerstmis, en in heel het huis,|Was geen teken van leven, zelfs niet van een muis.|De Goo-ballen lagen bij het vuur te dromen,|In de hoop aan de bordjesschilder te ontkomen.|Mooi niet! Laten we het cadeau alvast openmaken.|-Ebenezer Bordjesschilder" fr="C'était la veille de Noël, lorsque dans toute la maison|Personne, pas même une souris, ne laissait entendre un son.|Les Boules de Goo étaient nichées bien au chaud près de l'âtre.|Dans l'espoir d'éviter la colère du peintre des pancartes.|Pas de chance. Ouvrons les cadeaux en avance.|-le peintre des pancartes Ebenezer" /> <string id="SIGNPOST_JINGLEBALLS_2" text="A bundle of toys lying here 'neath the tree?|Could Chapter Six be there just waiting for me?|Bah, only more Goo Balls in festive attire.|But yummy, let's roast them all over the fire." es="¿Hay acaso regalos esperando bajo el árbol?|¿Estará allí el Capítulo 6 esperándome?|Bah, sólo más navideñas Bolas de Goo.|Ñam ñam, vamos a asar las castañas." ru="Гора игрушек, возлегающих под елкой?|Или шестая часть игры там ждет меня?|Эх нет, и только шарики Гуу одеты как с иголки.|И значит нужно их поджарить, сидя у огня." de="Ein großer Geschenkeberg liegt neben dem Baum so fein?|Könnte es das wartende, sechste Kapitel sein?|Bah, nur noch mehr Goo-Bälle im festlichen Gewand.|Lasst uns sie über dem Feuer rösten mit knusprigem Rand." nl="Zie ik speelgoed liggen onder de boom?|Hoofdstuk Zes misschien, waar ik al tijden van droom?|Bah, meer Goo ballen met muts en baard.|Maar wel lekker, geroosterd boven de haard." fr="Qu'est-ce derrière l'arbre, un tas de jouets?|Est-ce le chapitre six que depuis longtemps j'attendais?|Oh, ce ne sont que des Boules de Goo dans un déguisement joyeux.|Miam, faisons-les rôtir au-dessus du feu." /> <string id="SIGNPOST_JINGLEBALLS_3" text="As I drew in my head, and was turning around|Up the chimney escaped the Goo Balls with a bound.|But I heard them exclaim, 'ere they climbed out of sight,|"Happy Christmas to all, and to all a good-night!"" es="Tal y como había imaginado, y así sucedía|por la chimenea escapaban las Bolas de Goo.|Pero las oí gritar, al escapar de mi vista,|"¡Feliz Navidad a todos y Próspero Año Nuevo!" " ru="Я обернулся так, что растянул всю шею, что за наказанье|И дымоход скрывает шариков бегущих, что есть мочи.|Но прежде чем убраться с глаз долой, услышал я их восклицанье,|"Счастливого Рождества, и всем спокойной ночи!"" de="Dann wollt' ich die Fensterläden zuzieh'n|und sah den Haufen durch den Kamin entfliehen.|Doch ich hört' sie noch rufen, von fern klang es sacht:,|"Frohe Weihnachten allen, - und allen gut' Nacht!"" nl="Toen ik even niet oplette, namen ze de benen,|En zijn de Goo-ballen door de schoorsteen verdwenen!|Maar ik hoorde ze roepen, door de schacht,|"Vrolijk kerstfeest allemaal, en een goede nacht!"" fr="Alors que je levais la tête, en regardant partout|Par la cheminée s'échappaient les boules de Goo.|Alors qu'elles disparaissaient, leurs paroles j'entendis,|"Joyeux Noël à tous, et à tous une bonne nuit!"" /> </strings>
ANT build file
This ANT build file is used by davidc to build distributions of multiple addins. It's not required for general addin development but is provided here for anyone who may wish to use ANT.
You will need ant-contrib for the <foreach> task. Addins should be in individual subdirectories. It will automatically read the addin.xml file to pick up the IDs and version numbers.
<?xml version="1.0"?>
<!--$Id: build.xml 263 2009-04-22 23:53:12Z david $-->
<project name="addins" default="build" basedir=".">

  <property name="addins.src" value="src"/>
  <property name="addins.dest" value="dist"/>

  <taskdef resource="net/sf/antcontrib/antlib.xml" classpath="../lib/build/ant-contrib-1.0b3.jar"/>


  <target name="build" description="Builds all addins in the src directory">
    <mkdir dir="${addins.dest}"/>

    <foreach target="-foreach-addin" param="src.dir">
      <path>
        <dirset dir="${addins.src}" includes="/*/">
        </dirset>
      </path>
    </foreach>
  </target>

  <target name="-foreach-addin">
    <!-- Read the XML file to get the addin name and version -->
    <xmlproperty file="${src.dir}/addin.xml"/>

    <fail unless="addin.id" message="No Addin ID set in ${src.dir}"/>
    <fail unless="addin.version" message="No Addin version set in ${src.dir}"/>

    <property name="out.file" value="${addins.dest}/${addin.id}_${addin.version}.goomod"/>

    <zip file="${out.file}">
      <fileset dir="${src.dir}">
        <exclude name="**/.svn"/>
        <exclude name="**/Thumbs.db"/>
      </fileset>
    </zip>
  </target>

  <target name="clean" description="Removes everything that was built">
    <delete dir="${addins.dest}"/>
  </target>

</project>